Here's another one, how can I achieve the light rails seen in this picture:
Nokia Lumia 1020 camera on show: shutter speed ? Nokia Conversations : the official Nokia blog
The article does talk about shutter speeds, but does not really give step-by-step instructions, and my feeble attempts at trying this did not work.

Light trails are all about taking a picture over a longer period of time. This means you need to set your shutter speed to the longest you can (4 seconds, I believe) in order to let light in over that period of time. While the picture is being taken over those 4 seconds that's when it's your time to shine. Literally. It's always fun to get a torch and make shapes and write things in the air. Believe me, it's hard to write things accurately and some of the more mind-blowing photo's you can find using this technique are sometimes taken over the course of 10-60 minutes and involve people incredibly skilled at their craft. Search "Light painting" to find out more about this.
On our phones, though, we can only manage to produce a 4 second exposure. The way you do this is as follows.
- Use a tripod. Keeping the shutter open for a longer time means that your camera is extremely sensitive to light and motion. Especially your own motion. Stick your camera on a tripod and use the touch screen to start the exposure.
- The actual settings you use will vary a little depending on how much light you want in your scene and the ambient lighting. You want to let in light over a period of time and your camera is designed with a large aperture lens to let the most amount of light in as quick as possible (it's known as a 'fast' lens) so you're going to want to under expose your shot so you don't get a mainly white shot., so stick that on -2. Play around with your ISO levels (your sensitivity to light) and experiment with anything from100-400. The higher the ISO number the more light will be in your picture. You want your camera's sensitivity to light to be low so that your final image doesn't look completely white0washed. Reminder: the higher the ISO setting, the more noise will be in your picture.
- Make sure your flash is turned off and also make sure you're focused on the right place in the shot before you take your picture.
Once you're set up go wild with a torch and you can get some amazing results.
open water
looking towards shore lines of beaches
or marshes full of trees
sun about over head, 5pmish height
This one is slightly more difficult. You have to remember that your camera has a fixed f2.2 aperture lens and any kind of photographer will recommend a small aperture lens that's between f5.6-8 or even smaller depending on the scene. The fixed f.2.2 aperture lens in your 1020 means that your camera has a small depth of field, meaning that the area of a scene that's in focus is quite small compared to a small aperture lens, which has a much larger area of a picture that is in focus. What all this means is that your phone isn't really tailored to take landscape shots.
I'm not saying it can't be done. I'm saying getting a crisp landscape shot with a large aperture lens is hard. Here's what I'd do to try to get a good picture, nevertheless:
- Use a tripod. Any movement on a large aperture lens is exaggerated when it comes to a horizon line and that's the element you're going to want to be pin sharp. If you take a picture like this by hand you're never going to be able to keep it still enough to get it pin sharp unless you compose your picture with the most amount of light you can get. The more light you can get, the sharper your picture is likely to be. The use of a tripod here will mean you can take a longer exposure, giving you some flexibility over the settings you use.
- At 5pm with an overhead sun it will vary but I'd try an ISO anywhere between 100-400.
- Set your manual focus to infinity. These f2.2 larger aperture lenses are basically built for short-mid range shooting so you're never going to get a horizon line with absolutely crisp details. If you can, try to fill the mid ground with a focal point and make that dominate the scene. If it's close enough, you can try to focus on that point but it will blur the horizon and other background details slightly.
- As far as exposure and shutter speed go they depend on the scene. Experiment with a faster shutter speed and slow it down over time with your tripod until you get the result you want. If you can get a tripod you shouldn't really struggle with sharpness.
I live in the UK so I don't have a 1020 yet (fingers crossed I'll be able to get one at some point!) but I think experimenting with this ball park of settings will give you some acceptable results. Don't forget to shoot landscapes during the golden hours - when the sun rises and sets. It means early morning and late nights but it's worth it.
What is a good shutter speed for action shots. Auto won't work well with fast action, but the first half of the dial settings (1/16000-1/50) just return a black photo. ISO settings seem to have no effect. Not sure why they would allow the setting so fast that half the options do not capture enough light to expose a shot.
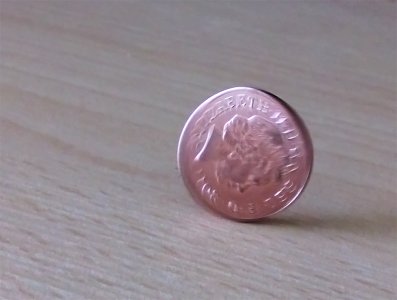
Like I say I don't have a 1020 as of right now, so Edwins Hubble's pictures will probably give you an idea of what your phone can do, but these are the results I got with my 920 and it's dual-LED flash and a picture without flash. I'll start without the flash:

So, I played around with all sorts of settings in a medium low internal environment and while there's still some movement on the shot above, I was able to get the majority of the middle section of the coin in focus, which is all you can really ask for with these camera's without a flash.
- Now, we want to freeze the motion of something, which means you're only opening the shutter for a fraction of a second. This means we need to set the camera up to take in as much light within the time the shutter is open as physically possible.
- I found that using ISO 200-400 gave the best results and didn't give me a load of noise. I set the camera up to over expose the shot as much as I could and made sure to set the focus point manually before the shot.
- I used a shutter speed of 1/100 sec because as Edwin said if you use a shutter speed that's too quick you can get a really crazy 'bending coin' effect, known as aliasing. It looks cool but it's not what we want. I found that for the speed I was spinning the coin, 1/100 sec was just about right.

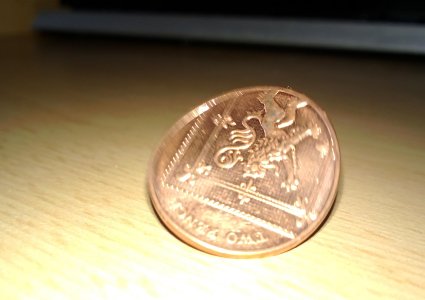
My flash example isn't nearly as good as Edwin's. My 920 only has a dual-LED flash, which is much slower at firing off it's flash than a 1020's Xenon flash. The flash is used to literally 'freeze' motion. You can see the difference this has between the two phones - the 1020's Xenon flash literally freezes the coin's motion and it's basically pin sharp. The 920's flash still captures some motion but the middle section of the coin is sharp. The tail and feet of the lion are basically pin sharp considering how fast the coin itself is spinning.
To freeze a spinning coin with flash n these conditions, inside in a medium-low light environment we need to take a different approach to the settings without flash.
- We can use a higher shutter speed, because we're going to be lighting up the scene, so I used a shutter speed of 1/250 sec. I set the ISO down to 100 because we're lighting up the scene we don't need to make the camera extra-sensitive to light. It also means we won't get much noise at all in the picture.
- You can set your exposure to the middle value or perhaps even a little under expose the scene because of the flash. I took the shot slightly too close to the desk, which is why the bottom half of the picture is so white - don't do that when you try!
I hope some of this has helped!


