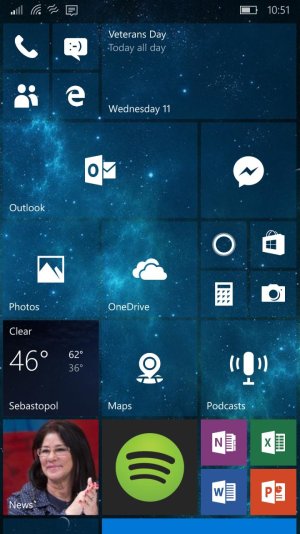
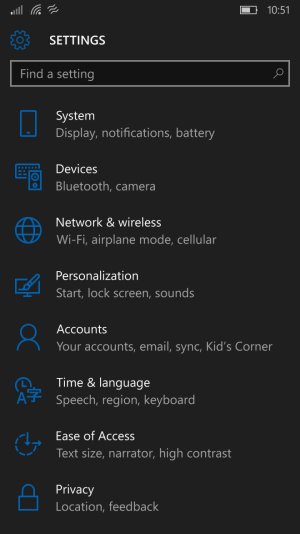
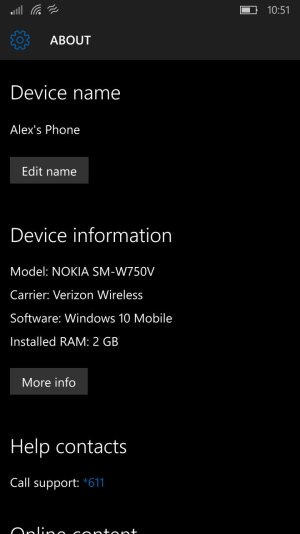
Alright guys, I’ve never gotten to contribute anything to this forum before so I’m excited to bring you this guide. I’m just a guy, I’m not a programmer, I’m not a hacker, just a lover of Windows and super excited to bring W10M to your Ativ SE. Obviously if you brick your phone doing this I’m not responsible. Think long and hard about this decision before attempting! 
I can’t take credit for any of the hard stuff. I just turned the babble from the Windows 10 on Ativ SE thread into a comprehensive guide. The real credit goes to these guys and gals:
Brad Herr
fatclue_98
Jeemo
arct1cblu3
So check out That Thread and make sure to give them lots of thanks and lovin.
On to the fun stuff.
First things first -> Download this ZIP
Inside you’ll find three files:
1. CustomPFD_003.xap
2. CustomWPSystem_006.xap
3. WP8.1 SDK Tools Setup.zip
4. Extract the ZIP and set the Custom XAP files aside.
Install the WP8.1 SDK Tools on your PC. This will install three programs on your computer which can be found in Start > All Apps > Windows Phone 8.1 SDK
In this folder will be the following programs:
1. Windows Phone Application Deployment 8.1
2. Windows Phone Developer Power Tools 8.1
3. Windows Phone Developer Registration 8.1
We won’t use #2 so disregard that program.
Now that your PC is set up to upgrade your phone we need to make sure your phone is ready to receive the update. There are a few important things to know about where you need to start with your phone.
You MUST begin this process with STOCK Windows phone 8.1.1 this means only OTA updates. If your phone is not on STOCK Windows Phone 8.1.1 then you need to flash back to 8.0 (there are many tutorials on this) and re-upgrade using OTA updates to 8.1.1.
Once you’ve confirmed you’re on STOCK Windows Phone 8.1.1 we need to do a hard reset of your phone. This is a MUST. Some people say you need to do this twice, I did mine once and it was fine. In order to do a hard reset on your phone, proceed with the following steps:
1. Shut your phone all the way down.
2. Power on your phone while holding the Vol Down button
3. You should see a screen with an exclamation point!
4. IN ORDER (not all at once) press: Vol Up > Vol Down > Power > Vol Down
5. Your phone will now wipe itself and give you a fresh 8.1.1 set up screen. This may take some time so just leave your phone be until it’s finished.
When setting your phone back up from the hard reset, ONLY:
1. Connect to WiFi
2. Connect to your Microsoft account
3. DO NOT RESTORE ANY BACKUPS YOU’VE MADE
4. Wait for all apps to finish installing
5. Skip Verizon’s bull crap and you will be taken to the start screen.
Go directly to the Windows Store, then search, download, and install “Preview for Developers”
Once this program is installed open your phone settings and navigate to Storage Sense
Select Phone, then select the Preview for Developers app and tap ‘move to SD card’
Alright, your phone is 99% ready to go, now we need to switch back to the PC to finish up a few more things. Don’t worry, you’re already more or less half way there.
Back on the PC! Remember those programs you installed from the setup file in the ZIP? Time to put them to use. Go ahead and plug your phone into your PC and make sure your phone shows up under My Computer, you need a solid data connection between the two for this to work.
1. Again, navigate to Start > All Apps > Windows Phone 8.1 SDK
2. Open the program “Windows Phone Developer Registration 8.1, the onscreen instructions here are pretty clear but in case you’re having trouble make sure you’re device is unlocked and on your Start screen with the live tiles. This won’t work unless you’re there on the phone.
3. Click to register your device as a developer phone.
Now let’s look at those files you set aside from the ZIP folder.
Open your phone in My Computer on your PC and open the SD Card folder. This is called the root directory and this is exactly where you want to place the file. Now paste CustomPFD_003.xap into this folder and close the file explorer.
Sweet another part done. Finally, we have to deploy (or sideload) the WPSystem XAP file.
1. For the last time, navigate to Start > All Apps > Windows Phone 8.1 SDK
2. Open the program “Windows Phone Application Deployment 8.1
3. Leave the Target: “Device”
4. For app, click Browse, then select your CustomWPSystem_006.xap
5. Your phone may need to be on the home screen now, so do so (better safe than sorry!)
6. Click Deploy
7. Check your app list from your phones Start Screen to make sure it has been installed as an app.
Great job! We’re done with most of the icky stuff now, the rest is mostly simple button pushing. What we’re going to do next is use WPSystem to convert Preview for Developers into a registry editor. It sounds scary but it’s relatively easy if you follow the directions closely. There’s a few things you need to make sure of before we move on to the next steps or nothing will work from here on out and they are as follows:
1. Preview for developers must be installed on SD Card storage
2. Custom PFD must be on the SD Card (root directory)
3. CustomWPSystem_006.xap must be on phone storage
CustomWPSystem is the app we deployed with the SDK, it may have deployed to the SD Card depending on your phones settings. Now is a good time to go into Storage Sense and make sure all of these things are where they are supposed to be. A few quick button presses and presto, we’re good to go. Onwards!
Go ahead and go to your app selection screen on your phone from the Start Menu and open up the newly deployed CustomWPSystem app. When it opens there’s a lot of writing. Ignore it.
1. At the top you’ll see “SD Card Permissions” in Red. Tap it.
2. Browse and select SD Card ONCE.
3. Tap the check mark at the bottom to apply the changes.
4. “SD Card Permissions” should now be Green! Yay!
5. Click “Browse XAP” at the bottom.
6. Browse and select the CustomPFD_003.xap that we put in the root directory of the SD Card
7. Click the “APPLY XAP” Button
Good news, you’ve successfully turned the “Preview for Developers” app into a zombie slave to do your bidding! If you aren’t proud of yourself by now, you should be!
NEXT WE WILL BE EDITING THE REGISTRY. EDITING MICROSOFT WINDOWS REGISTRY FILES IS DANGEROUS (yes more so than everything else you’ve done so far) FOLLOW THESE DIRECTIONS CAREFULLY! PURPOSELY OR INADVERTANTLY CHANGING REGISTRY FILES OTHER THAN THOSE LISTED CAN AND WILL PERMANANTLY DAMAGE OR DISABLE YOUR DEVICE.
Okay guys you’re doing great. Let’s edit the registry, just relax and focus. YOU CAN DO THIS!
1. Soft reset your phone by holding the Vol Down and Power buttons until the device reboots.
2. Open Preview for Developers (the now Zombified Version)
3. Navigate to HKLM > System > Platform > DeviceTargettingInfo
4. Change phoneManufacturer to “NOKIA” (without quotes)
5. Change phoneManufacturerModelName to “RM-927”
NOTE: We do the 927 because that HAPPENS to be the supported Lumia Icon, which HAPPENS to have the same chipset/architecture as the Ativ SE. It also includes provisioning for Verizon and it’s network!
6. Tap “Write” then tap “Apply”
7. Close the app.
HOME STRETCH! YOU’RE IN THE HOME STRETCH! YOU CAN NOT MESS THIS UP IF YOU TRIED!
You’re almost there guys, seriously. All you need to do is this:
1. Open the Windows Store
2. Search for and download the “Windows Insider” app.
3. Select “get preview builds”
4. Select your desired insider ring (fast or slow)
5. GET THAT MOTHER F*%#(&$ UPDATE YO!
6. NEVER DO A HARD RESET EVER AGAIN!
Well, that’s the end everyone. I hope you enjoy Windows 10 Mobile as much as I do. There are so many new great features, everything is running super smoothly on my Ativ SE. Again I can’t take credit for any of the hard stuff. I just turned the babble from the Windows 10 on Ativ SE thread into a comprehensive guide. The real credit goes to these guys and gals:
Brad Herr
fatclue_98
Jeemo
arct1cblu3
So check out That Thread and make sure to give them lots of thanks and lovin.
Alright guys I’m out!
Peace,
asellite
EDIT: Here's some screens of the finished project!


Last edited:


