Cooler Master H500M Build Log

TechFreak1

Moderator
May 15, 2013
4,611
5
38
Visit site
I'm looking for recommendations of ATX / Mid-ATX PC cases that enable vertical GPU mounting with a side panel that allows for airflow without any sort of case modification.

Here is the why:

My PC is currently is on it's last legs and I've narrowed it it down to the GPU actually pulling off the PCI-Express slot out off the motherboard.

It's far too heavy for the PCI-E slot as the only support for the weight is the i/o shield attached to the case. The card facing the drive cages is slightly at an angle and is getting worse over time.

Two days ago I had an instance that reminded me of a GPU failure that I've come across when ATI made GPU's (AGP days, pre-pci-express) where all the graphical assets became all multicoloured and fuzzy.

Secondly, it cannot over clock reliably any more even at stable clocks that I know are stable - the default clock for my card - XFX RX480 GTR Black Edition (8Gig) is 1338 Mhz. I've been able to over clock it to 1450 Mhz (Asic Value of 74.4%) and it was stable. It no longer is able to maintain 1400mhz as the PC crashes.

As the card is fairly heavy, I need a case that support's vertical mounting. I've seen a fair amount however they are poorly designed for vertical mounting as the side panel is either tempered glass or perspex. With the card blowing directly at the side panel..thus stuck with poor air flow unless I modify the case... which defeats the purpose of buying a expensive case imo.

So any recommendations?
 
Last edited:

TechFreak1

Moderator
May 15, 2013
4,611
5
38
Visit site
After spending a while looking through cases and reviews, I've chosen the Cooler Master H500M (MCM-H500M-IHNN-S00) as it also includes a GPU support arm (So far I've seen no other cases ship with it by default - I've found a retailer who sells said support mounts but they charge upwards of $50) which would help with the gpu sagging, decent amount of custom water cooling mounting, alot of airflow, vertical gpu mounting so I have that option when I watercool the card, usb type-c support on the front of the case, 2x200 mm front intake fans all under £200.

The tempered glass at the top covering the top exhausts is a minor issue as I can increase the clearance distance using slim fans and the same applies to the front intake fans. I currently have two 2000 rpm slim stream scythes which I can use in the case as top exhaust fans.

The other issue is there is no gromit in the rear of the case for easy drainage for watercooling so therefore may have to use some soft tubing to create a easy to move drain pipe or use the vertical GPU slots at the back. I don't plan on using any mechanical drives so the bays being housed under the pump mount is not an issue.
 

TechFreak1

Moderator
May 15, 2013
4,611
5
38
Visit site
Re: Cooler Master H500M Dual Loop Build log.

Looks like this might become a mini build log haha, I'm adding my thoughts here as I'm sure I am not the only one who is concerned about thermal throttling on VRMs on higher core cpus.

Plus to help others who may considering building a PC of their own by combining solutions, issues encountered to the forum in one place (as well as getting feedback / advice from the community as I'm not an expert lol nor do I claim to be an expert haha).

So without further ado my thought processes:

Asthetics are secondary for me however they still are a factor as I have a dual loop with two different dyes in mind for my pc build. As the case in gun metal, I was thinking of blue and another colour - haven't decided yet.

The main reason I wish to get slim fans is that my ultimate plan is to mount both 360mm radiators at the top of the case, with the fans blowing out through the radiators.

So Radiator A) will be mounted inside the case with the fans blowing out and Radiator B will be mounted in the top section of the case, with either fans blowing out through the bottom the radiators (ideal scenario) or the fans mounted ontop of the radiator pulling air out of the radiator.

So effectively there is a wind tunnel effect created through the radiator fins thus forcing air out through the top of the case. This avoids having hot air blow through the case with the radiator mounted in the front of case behind the 200 mm fans.

Having looked all the reviews it seems the noctua NF-A12-15 will be the best bet but that leaves only 1 mm of clearance with 27mm thick radiators. As they are 15mm thick - the best ideal fan Noctua NF-P14r with 12/13 mm thickness as that leaves room of 3 to 4 mm of clearance for air flow (wish cooler master made a mesh top plate for the h500m as that would solve all my problems).

The other options are finding even slimmer radiators although I'm not sure that's possible with 360mm radiators or get even slimmer fans. I have 2000 rpm 120x120x12 scythes and they are pretty quiet but the backside of the fan does touch flat surfaces therefore causing them to catch. The solution is to use thick washers to elevate them off the surface, which also act as noise dampners.

Worst case scenario is to build like everyone else and mount a radiator on front of the case... which to be frank is both boring and means hot air will be absorbed by the reservoirs so you're literally moving warm water around (thermodynamics) as the only place to mount the reservoirs in the case or most cases is behind the front radiator. However there is a possibility of using multiple smaller fans in the front of the case, some as intake and the fans mounted on the front radiator as an exhaust.

So in this case the top 120 mm fan would be intake, next two 120 mm fans would be exhaust - which would align with the fans on the radiator and bottom 120 mm fan would be an intake. The draw backs of this method a) expensive as you need more fans and thus more fan splitters b) You could end up creating dead zones and thus causing dust to build up.

Reversing the rear exhaust fan as an intake won't work because the air pulled in will be just vented out by the fans venting out through the top radiator. Reversing the fans on the radiator as intake... that doesn't work either as your venting hot air in again...

The ideal goal is to remove all hot air out of the system and maintain postive airflow through the front of the case.

I've seen comments why it's not "necessary" to have dual loops however these commentators aren't considering the following:

1) Don't have to drain the CPU loop to change the GPU and vice versa.

2) You're not efficiently cooling either the GPU or the CPU with either a GPU -> CPU -> Radiator -> Reservoir or CPU -> GPU -> Radiator -> Reservoir. Especially with CPUs with higher TDPs and higher number of cores... then you need to take into account the thermal increase on the VRMs as you shove more voltage onto your CPU. So you need add that into the loop as well thus introducing more heat.

Also with a single GPU-> Radiator -> CPU-> Radiator loop doesn't effectively cool either the GPU or the CPU at higher over clocks. You're better off having seperate loops at this point if your going for such a loop configuration.

3) It allows you to easily upgrade your GPU loop when you add another GPU again without having to drain your entire CPU loop. So if you end up with a dud GPU... you have to drain the entire loop again, flush it, replace the fluid if you accidently contaminate the fluid which can be very costly and messy.

4) If you have a leak, you only need to drain one loop although one could argue two loops means twice the chances of leaks. However with a single loop you either have a very long loop or use multiple fittings which can be expensive as well as increasing failure points.

5) With two loops you can keep your loops really simple and effective - checkout Jayztwocents skunkworks build as a prime example of a simple two loop build.

As to the GPU, I will be reusing my XFX RX480:
  1. as it's still a fairly decent card
  2. I don't game that much
  3. saves money as GPU prices are crazy right now
  4. it over clocks pretty well.
  5. Freesync support (which is based on a open standard unlike G Sync)

The build will be a Ryzen Zen 2 build as the launch of that is about 6 months down the line. So it doesn't make sense to buy the CPU now as the price of the current gen will go down and worst comes to worse I've only waited a few months to buy the cpu.

The case should arrive before the end of December 2018 as I need to take care of a few things first.

Current Parts List:

https://uk.pcpartpicker.com/list/rJ2j7W
 
Last edited:
TechFreak1

Moderator
May 15, 2013
4,611
5
38
Visit site
Well, such is my luck I spoke far too soon or rather typed far too soon if you're being too literall about it lol. Due to unforeseen financial constraints, this build will take longer than anticipated as I am going to be out pocket by a very large margin by the end of the week. So the case is will be here by January or February >.<.

Which also means I'm going to have find alternative means to do my work and speaking of which... I have moved the GPU into the PCI-E slot at the bottom of the motherboard (that has reduced idle temps by 2 to 3 degrees as the PSU fan is literally sucking hot air out of the GPU. I initially thought it was locked at 8X as there is no setting in the bios to change it... oddly enough. However I was mistaken and it's another PCI-E x16 slot - confirmed by looking at the motherboard (P8Z68-V LX) manual.

The silver lining here is while the case purchase is delayed I can get to work on creating custom sleaved cables as the extremely good quality cables are very expensive to buy - as they are to be assembled by hand and take a considerable amount of time - especially cables with shorter inner strands and longer outer strands - therefore giving the cable a natural curve - making it easier for cable management (that is also dependent on material of the sleeve). I won't get into much detail as there are are vast amount of videos on youtube about custom cables. Plus no one likes reading long essays about the technical aspects of a cable haha... people just care about how it looks in the end.

To answer the question why, I am going to start creating the cables now before buying any parts.

1) Connecting the cable strands into the connectors is not hardest part when sleeving cables. I can always change the connectors later.

2) I can cut the cables to length if need be

3) I know the PSU I am going to use so I can buy the replacement cables and simply take the connectors of that if I can't find the connectors.

4) You can find the specifications and set lengths and almost PC cable as it's all standardised. I say almost, as there are exceptions when a case manufacturer uses non standard headers (thankfully that is a rare occurance these days) or a usb connection for the front io or it comes with a customised PSU unit in a non standard size (these are non modular most of the time).

So therefore waste case scenario I can create custom extension cables and switch the connectors out later.

The added bonuses is that I learn new skill which I can use for other PCs that I build for other people and save money at the same time.

Some of you may be thinking I have a high end rig :grincry: I do not - it was built in Q1, 2012 for my older brother's birthday present however he no longer uses it with no GPU as he was not gamer but with a creative sound card as he primarily used it for FL Studio. So instead of having it languish in a closet somewhere I took it lol and at the time I made this PC it was about £650 or so as it had no bells and whistles - no ssd but a 1TB mechanical drive and the default fan that came with the case.

It was designed to be hassle free as possible and it was until I put the GPU in lol.

Here is the current specs:

Storage: Crucial 500 GB SSD

Ram: 8.00GB Dual-Channel DDR3 @ 800MHz (9-9-9-24)

CPU: Intel Core i5 2500K @ 3.30GHz (Currently overclocked by XMP to 3.7 Ghz, manually was set 4.5 Ghz stable / reached 4.7 Ghz (Unstable) - XMP in use to troubleshoot).

Motherboard: Asus P8Z68-V LX

Case: A cheap thermal take with top mounted hdd bay.

PSU: Corsair 650M Non Modular

Optilcal Drive: TSSTcorp CDDVDW

Audio: Onboard

Lan: A cheap startek PCI lan card as the on board lan is dead and the top PCI-E x1 no longer works properly.

Cooling:

CPU: It's a 120 MM AIO, I forget which model as I built this about 6 years when Sandybridge was launched. I have a 120x120x12mm (2000 rpm) Slip Stream Scythe on it as I had clearance issues with the rear exhaust fan. Prior to getting the GPU it was mounted on the Mesh square on the side panel as it did not reach the top fan mount. The AIO is probably bone dry at this point lol...

I have had to mount it on the top mesh grill otherwise it was a whole new case.

Exhaust:

PSU FAN as PSU is Reversed - PC is on the floor, otherwise you're just venting dust into the case at 4300 RPM...

CPU Fan: 120x120x12mm (2000 rpm) Slip Stream Scyth blowing through radiator.

Rear: Default case fan (FAN A) 1000 RPM.

Side Panel: Uphere 120x120x25 1200 RPM (FAN B) blowing out for the GPU when it was on the top PCI-E Slot. This reduced temps when pushed considerably as I could feel the hot air on my feet when gaming.

Top Intake: Uphere 120x120x25 1200 RPM (FAN C)

Bottom Intake: with dust filter Uphere 120x120x25 1200 RPM (FAN D)

Fan A: Connected to Motherboard.

Fan B + C + D: connected to single fan header via splitters and powered by a molex adapter. The reason being is that they all operate at 1200 RPM+ or so when pushed. This allows me to control all three fans simultaneously and I only have three fan headers.

You may be asking why all the fans - a few reasons:

1) The up fans cost £9.99 for a pack of three from Amazon, whereas a single fan costs about £5 to £6 from the leading manufacturers.

2) I wanted to see how effective these cheap fans are in terms of noise, performance and airflow. So this way I can save money on cheaper fans if they perform really well and I can reuse them in the same case or other budget builds if opt to not to use them.

3) What is the point of having some fans laying around and not use them - effectively it's just a waste of £10. That's about 6 journeys on public transport, two £5 footlong subs, a cinema ticket etc.

That's it for now.
 

TechFreak1

Moderator
May 15, 2013
4,611
5
38
Visit site
Parts to be used for custom cabling:

  1. Sleeves:
  2. Combs:
  3. Connectors:
  4. Pins:
  5. Wiring:

Will update above list when the parts are purchased and where.

Looking through reviews, the powersupply chosen has been changed to the EVGA - SuperNOVA G3 (EU) 1000 W 80+ Gold Certified Fully-Modular ATX Power Supply

As apparently reliability is an issue with the Silverstone 750W PSU SST-ST75F-GS.

Here is the spec list for the EVGA powersupply showing the cable sizes.

https://www.evga.com/Products/Specs/PSU.aspx?pn=72FEF8C0-C7CC-4950-86F5-3256DB5F6684
 

TechFreak1

Moderator
May 15, 2013
4,611
5
38
Visit site
Update:

I found a seller on ebay selling 100 pcs of cable combs at £49.99 and purchased a packet thinking it was an assorted mix of different sizes. However it turns out the seller offers you the to pick which 100 pcs you want (with 3 sizes to choose from 2mm, 3mm and 4mm).

Which is a bargain especially considering importing them via alibaba or aliexpress actually works out more expensive due import duties and what not.

Links are as follows:
www.ebay.co.uk/str/Modpcuk/Cable-Combs-/_i.html?_storecat=24287301011


www.ebay.co.uk/sch/modpcuk/m.html?_nkw=&_armrs=1&_ipg=&_from=

The other reason why I am linking this seller is that he/she is extremely communicative and was amenable when I explained my situation and refunded my purchase. However I need to add at the time of cancellation I had not given any criteria for the pieces I needed thus did not obtain any cable combs. Therefore I cannot attest to the quality of the products themselves - so ymmv.

Unfortunately, no thanks to brexit I've had to tone alot of things back and have had to re-evaluate my entire pc build as the current price doesn't include the custom distribution panels I was looking to get. Even then it's a compromise build as I'm working around a case which only supports one vertical mounted GPU without any sort of modifications.

I was hoping to have my cables done by now but things hardly go as you planned.

The only silver lining I suppose, for the amount I would have paid for the H500M I can build a case bigger than the corsair 1000D.
 

TechFreak1

Moderator
May 15, 2013
4,611
5
38
Visit site
Update: Well, I haven't forgotten about the PC Build.

Life's been pretty damn crazy especially with brexit :grincry: paid work has been pretty hard to come by. So much so I've had to revert to using a spare mechanical drive... If I had an infinite money tree life would have been so much easier lol.

But never the less I started a new job this week, well not new persay it's the same job I've been doing for the past several months but this time I'm being paid to do same job and having more free time (well, some what...).

As well as getting a free qualification out of it, so win-win all around lol.

Once I've got all my prior commitments out of the way chiefly being vastly overdue POE 802.11 AC upgrade (as much I'd like to spend my wages on a PC but that's just irresponsible as the bills aren't going to pay themselves :grincry:).

I'll be working on the build as by then I wouldn't have a choice as my current motherboard is pretty much on the door step of death. Probably will be able to get a year or two out of it as a pfsense router... hmm...

Now, I need to go zap some spastic mosquitos with an electricified racket.
 

TechFreak1

Moderator
May 15, 2013
4,611
5
38
Visit site
Update: My main storage is arriving next week costing £134 from Amazon.

I opted to get a 1TB 860 EVO primarily for compatibility reasons as I would have to get a PCI-E Adapter for any NVME Storage to be used with my current zombie PC. The Cheapest I found was Intel's 660p PCI-E NVME at £98. Therefore any savings made would be lost getting a reliable PCI-E adapter (Plus it uses QLC, not TLC).

Secondly, apparently the life cycle of QLC is lower than TLC and given this drive is going to be my main storage drive - I want it to last as long as possible.

Otherwise I would have opted for the cheaper Samsung QVO 1TB.

The main reason I've bought a new SSD is that I've just gotten tired of the complete cold boot times of the slow as molasses 1TB Spare mechanical drive I'm using lol.

The plan is to partition about 120 gigs for the o/s and the rest for games + applications with 60/40 split between the two.
 

TechFreak1

Moderator
May 15, 2013
4,611
5
38
Visit site
Well, this was a surprise the SSD arrive today instead of tommorrow.

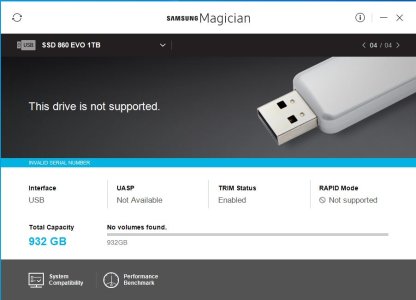
Samsung has really borked the Samsung magician software it seems, I plugged it into an external usb 2.0 adapter and had a brief scare when the magician software reported the SSD was not genuine :grincry::grincry:.

Oh no - ssd.JPG

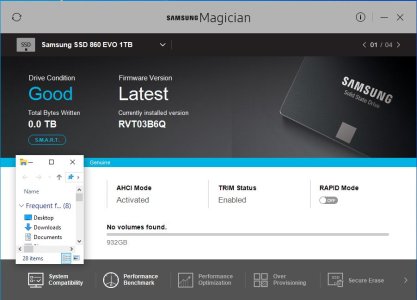
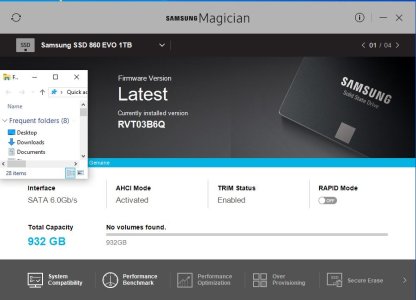
After plugging in the SSD directly to the motherboard using Sata cables etc:
Genuine SSD.JPG

Genuine SSD 2.JPG

The software detected it just fine.

But... the borked software followed and infected one of the trusty tools anyone should have - Rufus (Portable) as the latest version creates two partitions on the USB stick - one for UEFI and the other for Legacy boots. After using version 2.11 off my Laptop, the o/s installed just fine.

After a quick analysis, I decided to the split the drive as follows:

Drive Split.PNG

The local disk entries is the spare mechanical hdd I was using - in the process of migrating my data over as I did a clean install.

Unfortunately Microsoft has made an annoying change during the out of box experience - you don't get the option to set up a local account if you have an active internet connection.

I'll update this with screenshots when I get a virtual machine running using 1903.
 

TechFreak1

Moderator
May 15, 2013
4,611
5
38
Visit site
I don't think borked is the right word. It seems worse than borked...lol

Lol you've got that right. Spent the last two days testing my new components will update the thread after work tomorrow... as it's 1:23 AM now lol.

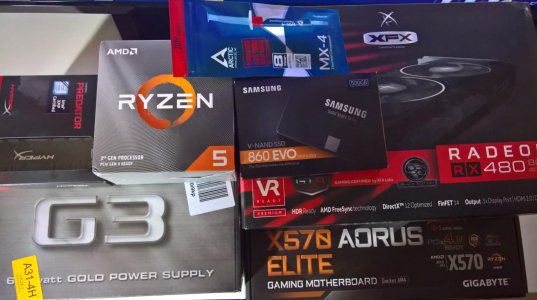
To save money I'm using my old GPU and the 860 EVO 1tb I bought, the rest arrived last saturday 28th sept.

Components.jpg
 

Golfdriver97

Trusted Member Team Leader
Aug 19, 2013
824
0
0
Visit site
I have an X570 myself. ASUS not Gigabyte. Same Ryzen 5 chip. Good combo in my opinion.

Nothing against Gigabyte. I have used their boards several times in the past; I just wanted to have experience with another OEM.
 

TechFreak1

Moderator
May 15, 2013
4,611
5
38
Visit site
@Golfdriver97 Nice, which motherboard Asus motherboard do you have?

-------------------------------------------------------------------------------
Update: after spending almost two days testing here the highs and lows in summary.

NB: All temps are in degrees celsius. Hwinfo set a sensor refresh of 100Mhz. Each Benchmark was run at least 5 times in quick succession.


----------------------------------------------------------------------------

First the bad news.

1) The Hyper X Kit - HyperX HX432C16PB3K2/16 Predator DDR4 16 GB (Kit 2 x 8 GB), 3200 MHz CL16

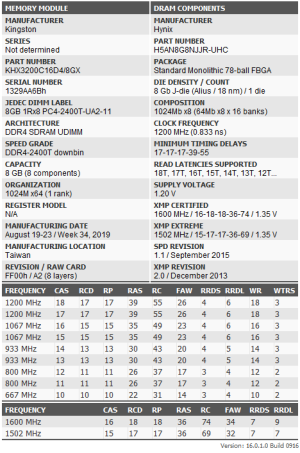
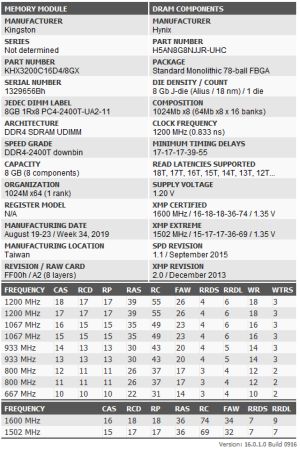
Was easy to get to the 3200 Mhz via the loaded profile. However it had ridiculous number of memory errors at 16-18-18-36 set via XMP or manually set in Memtest86 (bootable usb). I thought it was the crucial ssd (the dead ssd, I sort of revived by completely wiping it out). But it worked fine at 17-17-17-39 no matter what I threw at it.
Module A.PNGModule B.PNG

Taiphoon Burner (freeware) confirmed my suspicions, unfortunately I put too much faith in the ram and spent hours testing / trying to find the cause of the random crashes. As memtest when ran in the windows environment. I was only able to over clock to 3333 Mhz and no more. So much of the screenshots didn't even save... when it first happened I was perplexed.

So it's going back to Amazon for a refund.

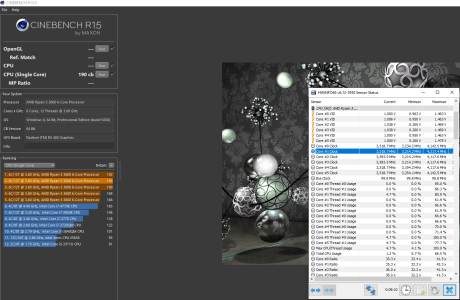
2) There are stories going around on the interwebs about the boost issues with the 3rd gen chips and can attest that they are true. As I was never able to get beyond 4117.6 Mhz sustained single core boost with either the latest bios update (f5b - 1.0.03 ABBA) and stock bios (f3 - 1.0.0.3 doesn't Gigabyte doesn't specify variant) both run a variant of the Agesa 1.0.0.3 update.

I got blips of 4217 Mhz after any benchmark ended with the ABBA update but not sustained. No matter what I tweaked I couldn't get the cpu to sustain it, so AMD seriously needs to fix the bios and chipset drivers.

4217 Mhz!.PNG

I was in two minds about sending the CPU back, but it just kept bugging me to no end and the fact the R7 2700X is now the same price what I paid for the R5 3600 (£192.98) that price drop sealed it for me - it's going back this weekend as the R7 2700X (£193.98) arrives tomorrow.


3) The motherboard, my biggest gripe about the Aorus X570 elite motherboard is that it had no power off / reset button on the board. Also the toggles sometimes toggle between 0, Manual and Auto for some settings. Plus I didn't find the use of page up and page down intuitive as I prefer to use them scroll up a page and down a page But you can use the plus / minus keys to toggle instead.

The chipset drivers on Gigabytes website... oh boy... here's a little taster when installing them:

Chipset drivers.jpeg

However!

The drivers from AMD's website work just fine and none of the rainbow effect malarkey when installing them.

------------------------------------------------

Now without further ado, the good news!

1) Oooh boy where do I begin...

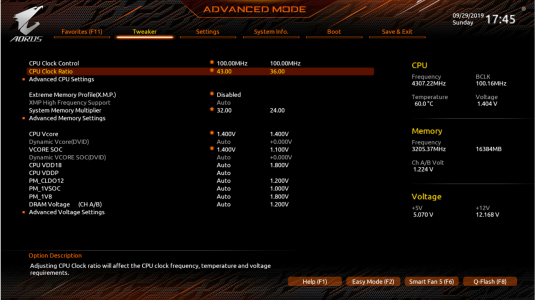
The CPU, the Ryzen 3600 is a nifty performer I was able to achieve 4.3 Ghz all core over clock albeit not stable using the wraith stock cooler with about circa 20 degrees celsius ambient temp. The Cooler Master H500M Case was out of stock on amazon when i bought the components (I'm not paying over £200 for a case no matter how good it is lol). I do plan to make my own case but I just don't have the time for that project.

This screenshot is taken by the screen shot function in the bios, pretty darn nifty as it saves people seeing my ugly mug in the reflection of the screen LOL!

4.3ghz Bios F3 Screenshot.PNG

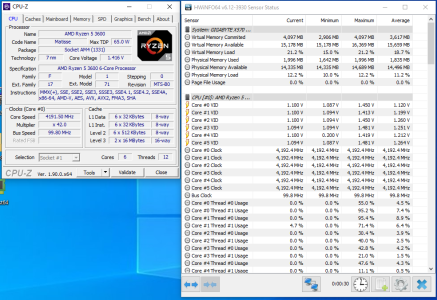
I was however able to get 4192 Mhz all core boot but given my ram issues I don't know if it was the stock cooler, the ram or if it wasn't stable under max load as it crashed under Prime 95. As I was able to use the PC for over ten minutes installing benchmarks and extracting files with no issues and I was getting random crashes when running benchmarks even at stock. But the oddest thing is that memtest never showed any errors, the only errors it would show is to say ram was locked by xyz programme.

4192.4 All Core.PNG

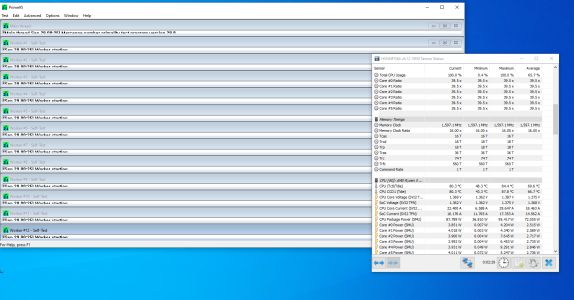
Never the less this CPU is a beast and this next screenshot shows why it beats the 3600X from a value proposition. With all cores overclocked with 39.50 x 100mhz multiplier it pulled 95 Watts under Prime 95.

39.50 multiplier 2.PNG

In terms of benchmarking performances, I found no discernable difference between the F5b and F3 bios as all variations fell within the margin of error.

This screenshot is with the F5b bios, all stock settings and XMP for 3200 Mhz as that is what the ran is rated to run at - out of the box it runs at 2400Mhz.
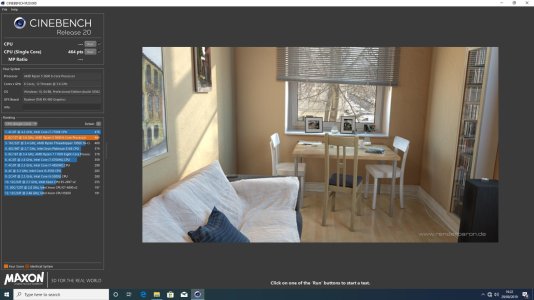
Single Core PB F5b Bios R20 xmp 3200.PNG

This screenshot is with the F3 Bios and everything stock + xmp 3200.

Cinebench R20 F3 Bios Single Core Stock.jpg

The above results are reproduceable hence one screenshot.

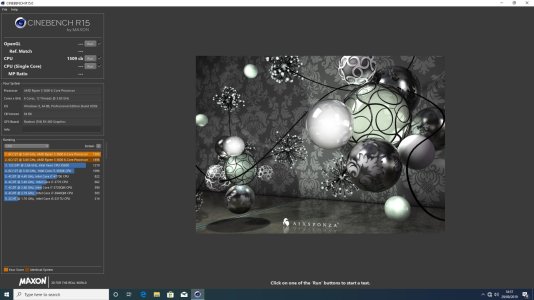
Here is the multicore benchmarks with the stock F3 bios.
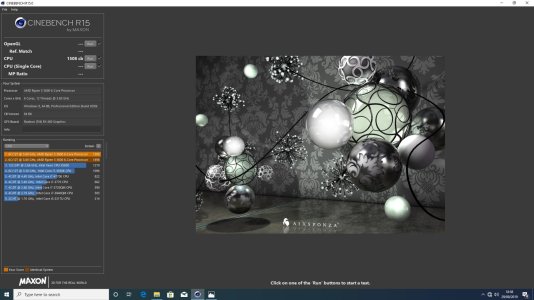
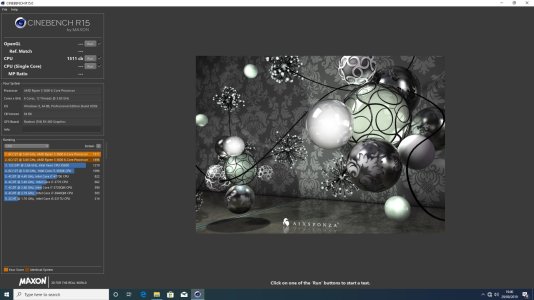
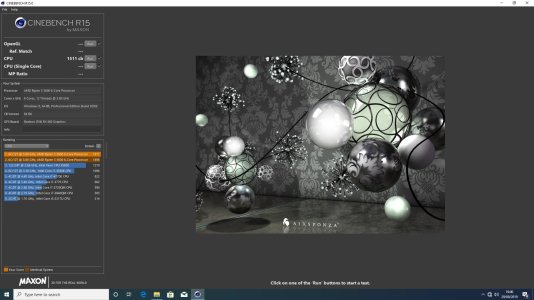
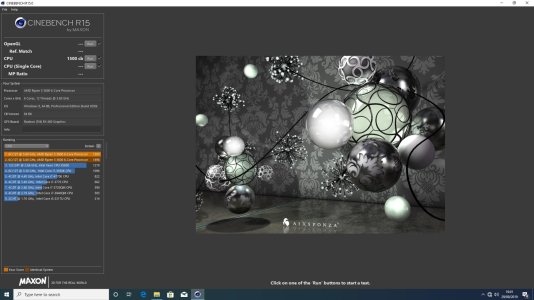
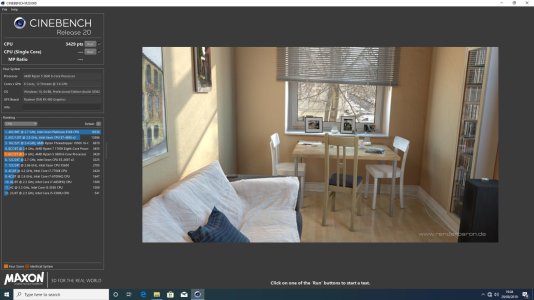
Cinebench All Core F3 Bios.jpg

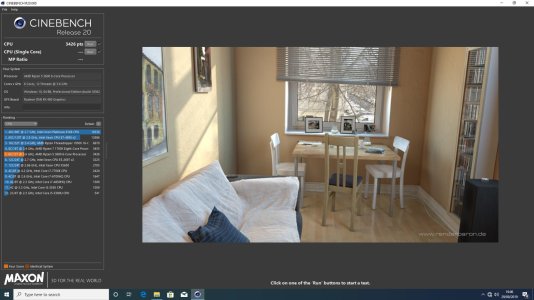
Cinebench All Core F3 Bios 2.jpg

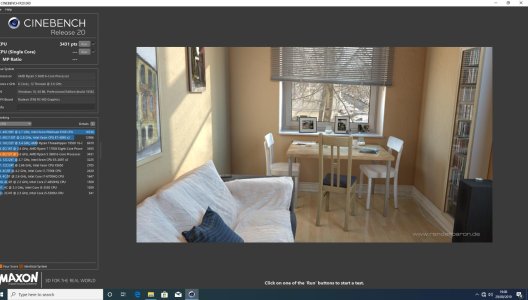
Cinebench All Core F3 Bios 3.jpg

Cinebench All Core F3 Bios 4.jpg

Cinebench All Core F3 Bios 5.jpg

As you can see there are quite alot of deviations which are reproduceable.

Cinebench R20 F3 Bios All Core.jpg

To be continued in next post.

Edit: Derp, I saved some file names with PBO instead of PB, precision boost overdrive was not used. As it's off by default when load optimised defaults is used.
 
Last edited:

TechFreak1

Moderator
May 15, 2013
4,611
5
38
Visit site
Cinebench R20 F3 Bios All Core 2.jpg
Cinebench R20 F3 Bios All Core 3.jpg

Even with the variances, this nifty little CPU beats out a 12core/24thread Xeon e5-2697!

Which is still being sold crazy prices...


Xeon overpriced!.jpg

2) The ram... I've got nothing to good say about the ram other than I was able to boot to desktop with 15-17-8-21 Timings.

3) The motherboard, is an amazing performer after all that testing I've never seen the VRM mosfet go above 44 Degrees under full load even with the CPU pulling 95 watts of power.

Buildzoid was definitely spot on when he said this motherboard can handle the 3600 easily. This motherboard is extremely feature rich and even has an LN2 mode lol.

The load balancing for the VRM are all presets and include a handy chart to show a power delivery chart. I found it quite easy to use after I figured out the toggles for increasing and decreasing values.

I suggest checking out his motherboard reviews for Ryzen.

All in all the ryzen 5 3600 is pretty good value for money.
 

TechFreak1

Moderator
May 15, 2013
4,611
5
38
Visit site
Update:

Almost 12 AM so a quick update.

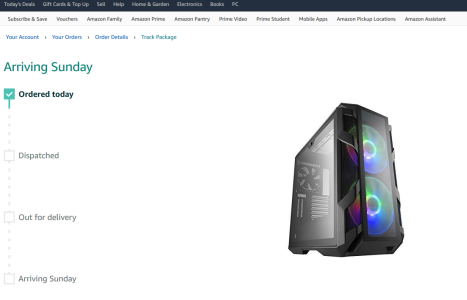
The cooler master h500m case was back in stock today on Amazon and so it's arriving on Sunday. Finally I can start putting my build together and start figuring out my loops. The plan was to use CAD / Blender to figure out the loops but life rarely goes according to plan lol.

Case.PNG


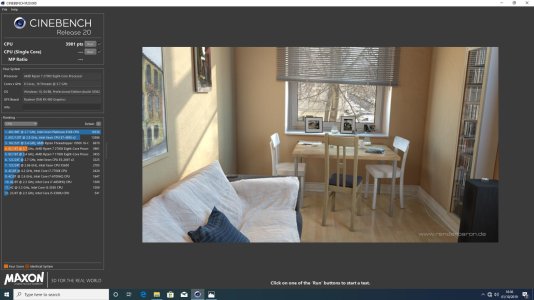
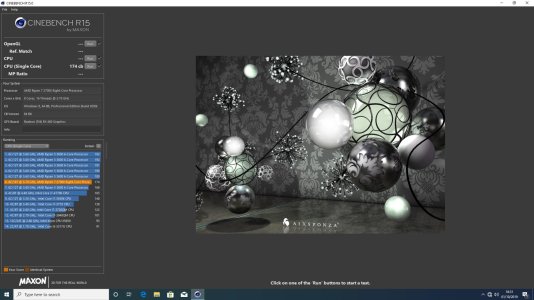
Also my R7 2700X arrive today and interestingly the R5 3600 beats it in single core benchmarks. All stock settings in the bios, the same bios used (f3), just the XMP of 3200 used as it was used for benchmarking the R5 3600 to get the ram up to the advertised speed.

F3 Bios XMP 3200 r7 2700X Single core.jpg

r20 r7 2700X single core f3 bios.jpg

It obviously is leaps and bounds ahead in multicore performance:

F3 Bios XMP 3200 r7 2700X All Cores.jpg

F3 Bios XMP 3200 r7 2700X r20.jpg

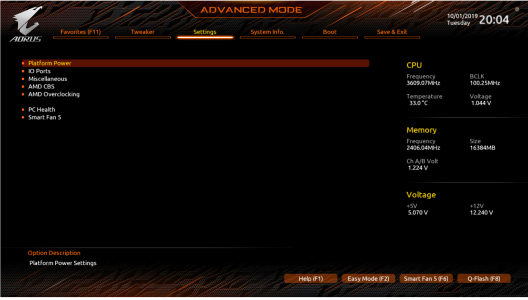
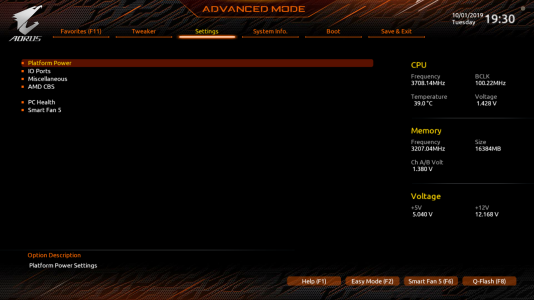
Also there are settings that are disabled on 2700X in the bios - which are enabled on the R5 3600. Initially I thought I borked the bios update as I updated to the F5B bios to do some additional quick testing on the R7 - that CPU locking mechanism for the bundled cooler is a pain in the rear end to remove.

Settings screen from R5 3600:
r5 3600 Settings Screen.PNG

Settings screen from R7 2700X:
r7 2700x settings screen.PNG

One of my cousins has asked me to build a PC for him after I've built mine, so I might end up keeping both CPUs after all albeit selling one practically at cost some time down the line.

He's a music producer so spends hell of a lot of time in various digital audio workstations (DAWs), so I will probably end up keeping the r5 3600 for myself (as I primarily need my PC for 3d rendering and some virtual machine work) and using the 2700x for his build - FL Studio for example is extremely CPU intensive.

He is however thinking about PC gaming so his criteria for the build may change.

Any way time to sign off, 8 minutes till 12 AM...
 

Golfdriver97

Trusted Member Team Leader
Aug 19, 2013
824
0
0
Visit site
Correction: It's the Prime X570-P. So a slightly different order in wording, but probably still got the point across.
 

TechFreak1

Moderator
May 15, 2013
4,611
5
38
Visit site
Correction: It's the Prime X570-P. So a slightly different order in wording, but probably still got the point across.

Not bad, I checked out the asus site listing for that motherboard.

How load is that chipset fan lol?

Looks like Asus and Gigabyte are using the same Bios layout as the standard mode looks just like Gigabytes and so does the advanced mode with the exception of Aura sync.
 

Members online

No members online now.

Forum statistics

Threads
322,736
Messages
2,242,598
Members
427,978
Latest member
Duouser3