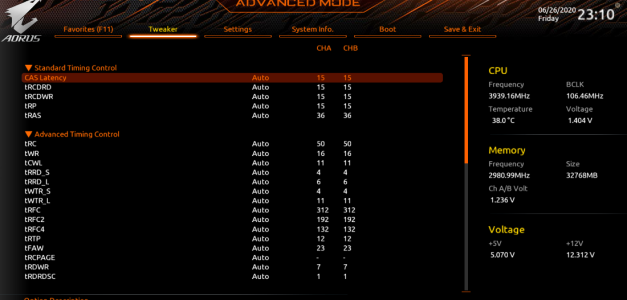
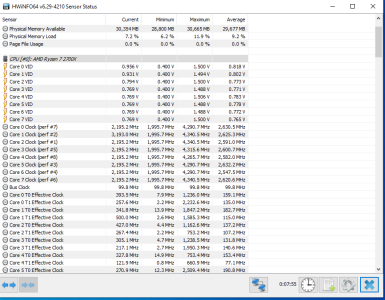
Finally got the ethernet port working on the H500M properly so I can upload images without waiting ages lol and post more detailed.. posts?

As you can see 0.00 Upload LOL!
Had to tweak some network adapter settings (enabled jumbo frames) and installed Intel's ethernet drivers.
Why some of you make ask why I didn't I use My old PC - that is because it is extremely flaky, so I didn't trust it to use it post proper updates - no point wasting time in typing up detailed logs only to find it never posted plus I just didn't have the time but now I sort of do..
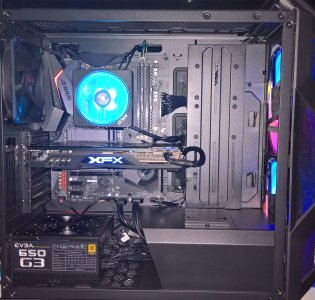
Anyway here is the somewhat final build without the custom work I'm planning to do.
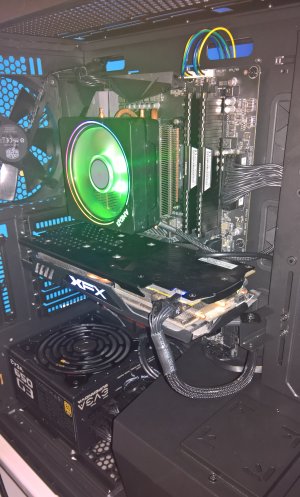
Not the best picture but best I could do given the circumstances as I had to assemble it on top of a small chest of drawers below the ceiling light so I could rotate it whilst I did the cable management and see what I was doing.
Cable management was both easy and a pain in the behind - as I had to remove the PSU shroud which is connected by four screws at the bottom of the case, two on the back below the PCI slots and one on the side above the plate that houses the RGB controller.
The cooler in the photo is the R7 2700X cooler which I have replaced with the bundled cooler with the R5 3600 - the RGB glare was bugging me to no end lol and also I wasn't comfortable with the insane amount of pressure it was putting on the CPU - you have to unscrew the mounting brackets (the plastic ones) included with the motherboard (circled in red) then gently take the heatsink / fan combo off otherwise you will end up yanking the CPU out of it's socket as the heatsink comes with a decent amount of thermal compound on it - in the shape of a square. The CPU was literally stuck to the heatsink so I had to gently pry it off using a plastic pry tool from a mobile phone repair kit.

I did take screenshots with performance differential between the HyperX ram and the Corsair Ram but forgot to transfer them as prior to using sysprep on the crucial ssd I was using to test the components - but the performance differential was about one to three points so within variance in Time Spy.
In regards to sysprep I didn't have any issues with things happening with other partitions, I created a test partition and put all the drivers, benchmarking software into it. Ran sysprep, plugged it into the old pc and Windows activated just fine. So after I transferred the 860 Evo after running sysprep to the Aorus Elite X570.
Put everything together, thats when I noticed the issue with USB 3.0 Header - I recommend getting one these to save you the headache plugging all the front i/o ports just to test the header.
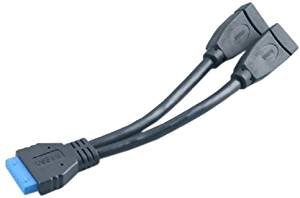
Got these after... and even then they didn't help - more on that later.
So I was kind of miffed, spend almost £200 on a motherboard and it's got a faulty usb 3.0 header. Switched the two cables around for both usb 3.0 headers and isolated it to faulty header resulting in a faulty usb port. When it first happened I was worried I might have bent some pins or the front i.o ports were faulty :grincry::grincry:.
So plugged in a usb key and checked if it showed up in the bios - alternating between ports & checking each header twice with each of the front i/o cables- it showed on three ports - except one. Contacted Amazon on the 10th and was transferred to a rep in technical support who was extremely helpful but he couldn't hold of Gigabyte and in the end he had to refer me to Gigabyte's support website on Friday the 11th - which is - esupport.gigabyte.com/Login/Index?ReturnUrl=%2f. As Gigabyte told him no support via phone until November LOL!
I ordered the internal connectors on the 10th and they arrived the day after - I turned the PC on, booted into Windows, plugged into usb keys into both connections of the y cable. Took off the front i.o connectors then put in the internal cable. Which re-confirmed one of the 3.0 usb headers was faulty.
Disclaimer: I wouldn't recommend anyone doing this incase you damage components with static discharge or accidently poke a fan or something lol. Unless of course you know what you are doing and looking at the inside of PC case doesn't immediately overwhelm you.
Despite this I decided to wait a day (saturday now) and see if it automagically fixed it self - it didn't - as I found through past experience sometimes faults just fix themselves after awhile - no idea how but it does. Whilst waiting I checked the gigabyte website to initiate the RMA process, but it states to contact the point of sale for anything related to warranty when I selected UK - it defaults to motherboard.
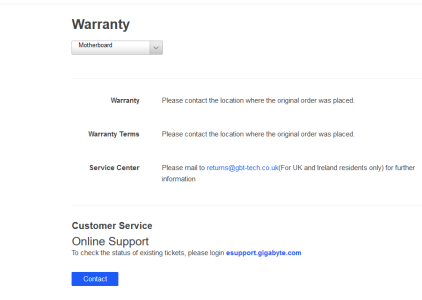
So Sunday morning at 8 am I contacted Amazon via live chat and the rep I dealt with in technical support dept was also extremely helpful and was sent a replacement that day which arrived in the evening. So had a nap, put everything together after waking up and went to sleep. Woke up early hours as something kept nagging me at the back of my mind, fired up the PC to reinstall Windows and nada. Puzzled, I checked all the front i/o ports again only to find this time the fault is on right handside of front i/o - where one was not working. At this point I felt like returning the motherboard lol.
So take out the case from where I placed it - completely half dead asleep - so I forgot to take off the side glass panels and completely forgot about the weight impact on my spine - side note - this is why you should it eat your greens. I haven't worked out at all since my surgery in April but I can still lift my own body weight.
Placed it on the desk and as I did so I popped upper spine as I forgot lower using my knees lol! The sliver lining there that jolt woke me straight up.
The case is fairly weighty with all the glass panels especially with the tempered glass side panels.
Checked both the USB 3.0 headers again and found the same header on the replacement motherboard wasn't working - using the internal usb adapters. Now at that point I felt maybe I damaged the pins on the CPU or the header or something. As a last resort I thought I'll switch the front i/o cables... and voila all front i/o ports were working T___T.
The downside is now there is an irritating high pitched whine from the chipset fan. Which can thankfully be removed as there are 4 screws on the underside of the motherboard.
I'll take some proper photos over the weekend of both sides of the case along with some other photos of the components.
After having worked with this case for brief time, I am happy with the case as almost everything can be unscrewed and removed. Plus the top bracket can also be removed also which gives me extremely alot of flexibility if I need to create a custom bracket for the two radiators.
I'm hoping to work around it using something like slim escutcheon screws and locking bolts - I have a pack of M2 escutcheon screws which look like they might do the trick. The idea is to thread the screws through one radiator, through the fan screw hole, into the bracket (this radiator will sit on the top of the case which as 50 MM clearance - I've checked with a slipstream 12mm fan and 25mm fan and a pack of gum lol), into the other radiator then into the other fan. All fans will be in push config - pushing air through the radiator.
The clearance on the top gives me enough space for 28mm radiator and 15mm fan. Unfortunately it seems there aren't any 12mm PWM fans out there.
I've done this before with my old PC as I had nowhere to mount the CPU AIO when I got the RX480. Initially I mounted it on the side of the case.
I'm not putting any radiators in the front of the case... the only compromise I can think of is I might have to install a 120mm radiator just for the chipset.
Anyway 2:34 AM... gotta crash.
Edit: OOPS!
I plugged in the extension cable the wrong way for the CPU fan... oops.. goes to show you always need to triple check check your connections. I cut off the plastic guides for pins as the slipstream scythes wouldn't connect. The connection came off when sticking the plastic back plate onto the side panel. It was either use an extension or have the CPU fan wire cross the ram modules.
