- May 15, 2013
- 4,627
- 21
- 38
Hello everyone, a friend of mine bought this to my attention and figured some of you may find this useful on Windows 10, therefore have made a little how to guide as it is a fairly easy reg edit - you only need to create one entry and does not require a reboot or require you to sign-out and sign back in. Furthermore this doesn't change functionality of the fly out (as far I have noticed) just the UX and the right click context menu on the battery icon still works as normal - as does the "mobility centre".
You can also toggle back and forth.
Disclaimer: Modifying the registry is very risky and not for the faint hearted as you could end up completely destroying your install {if you do not know what you're doing} and do irreversible damage if you do not take the proper precautions - Always back up the default entries you are modifying and create a system restore point before doing any edits.. I would say this absolutely mandatory if you're extremely new to this. I will not be touching on how to create a system restore point - see here - How to Create System Restore Point in Windows 10
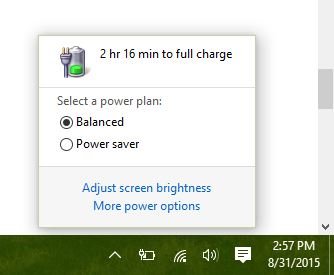
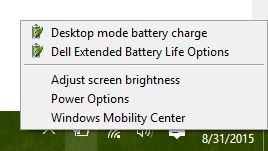
So without further delay, this little guide will change the battery fly out from:

To this:
.png")
{NB: I have a Samsung 850 EVO SSD in my HP Probook 4730s hence why my selected power plan is showing as "Samsung High Performance"}.
If your interested see below:
1) Open regedit.exe via the run command -
Alternatively you can use Cortana / Winkey+S (Search).
2) Navigate to HKEY_LOCAL_MACHINE\SOFTWARE\Microsoft\Windows\CurrentVersion\ImmersiveShell
IMPORTANT STEP - BACK UP:
Right click on "Immersive shell", left click export, save as what ever you like
fast startup - was a tweak for startup lag of 1 minute with AMD & Intel Display drivers - result: not fixed. Resolved with Leshcat drivers.
device meta data: Tied in with my investigation into to the start up lag with the aforesaid drivers.}
3) Create a new Dword Value (32 bit) via the right click context menu or you can use the "Edit" button then "New" on the toolbar at the top.
4) Type in "UseWin32BatteryFlyout" and press enter or left click anywhere in the whitespace of the registry editor. However if you have accidently left clicked elsewhere or pressed enter thus ending up a new value called "New Value #1". Not a problem you can right click on it and click rename - to rename it. Again alternatively you can use the "Edit" button then "Rename".
Or you could simply delete the newly created Dword Value and start again.
5) Double click on "UseWin32BatteryFlyout" and change the default value from 0 (being OFF or DISABLED)
to 1 (being ON or ENABLED).
6) There you have it:

To disable this tweak and go back to the default fly out style:
Simply change the value again as above [Step 5] but this time to 0.
Edit: 18/09/2015
Found this nifty tool Ultimate Windows Tweaker, (beats creating a script ) which you can use as quick toggle as opposed to using the registry editor as shown above.
Disclaimer: This tool has very advanced settings, only change them if you know what you are doing!
Otherwise you will completely mess up your install and may incur data loss.
1) Extract and Start Ultimate Windows Tweaker - upon starting it will create a recovery point so you can revert back later if you go crazy with the other settings. However it may not undo all your changes.

2) Navigate to the Windows 10 Tab at the top
3) At the bottom right hand corner untick and click apply to get the old style - the task bar will flicker and you may get a notification about a change. However if you want to re-enable, tick the box again and click apply again the taskbar will flicker.

Lastly it will prompt you to restart once you exit the tool, you can restart if you wish (unless you changed other settings which do require a restart to take affect then you will need to restart)
Download Link:
Ultimate Windows Tweaker 4 for Windows 10
You can also toggle back and forth.
Disclaimer: Modifying the registry is very risky and not for the faint hearted as you could end up completely destroying your install {if you do not know what you're doing} and do irreversible damage if you do not take the proper precautions - Always back up the default entries you are modifying and create a system restore point before doing any edits.. I would say this absolutely mandatory if you're extremely new to this. I will not be touching on how to create a system restore point - see here - How to Create System Restore Point in Windows 10
So without further delay, this little guide will change the battery fly out from:
To this:
{NB: I have a Samsung 850 EVO SSD in my HP Probook 4730s hence why my selected power plan is showing as "Samsung High Performance"}.
If your interested see below:
1) Open regedit.exe via the run command -
- Right clicking on the start menu / winkey + x or using winkey+r then typing in "regedit.exe" {without the speech marks}
- Press enter and accept the UAC prompt (if you have it enabled).
Alternatively you can use Cortana / Winkey+S (Search).
2) Navigate to HKEY_LOCAL_MACHINE\SOFTWARE\Microsoft\Windows\CurrentVersion\ImmersiveShell

Edit: You will need to click on this image to zoom in for more detail.
IMPORTANT STEP - BACK UP:
Right click on "Immersive shell", left click export, save as what ever you like


fast startup - was a tweak for startup lag of 1 minute with AMD & Intel Display drivers - result: not fixed. Resolved with Leshcat drivers.
device meta data: Tied in with my investigation into to the start up lag with the aforesaid drivers.}
3) Create a new Dword Value (32 bit) via the right click context menu or you can use the "Edit" button then "New" on the toolbar at the top.


4) Type in "UseWin32BatteryFlyout" and press enter or left click anywhere in the whitespace of the registry editor. However if you have accidently left clicked elsewhere or pressed enter thus ending up a new value called "New Value #1". Not a problem you can right click on it and click rename - to rename it. Again alternatively you can use the "Edit" button then "Rename".
Or you could simply delete the newly created Dword Value and start again.
5) Double click on "UseWin32BatteryFlyout" and change the default value from 0 (being OFF or DISABLED)

to 1 (being ON or ENABLED).

6) There you have it:
To disable this tweak and go back to the default fly out style:
Simply change the value again as above [Step 5] but this time to 0.

Edit: 18/09/2015
Found this nifty tool Ultimate Windows Tweaker, (beats creating a script
) which you can use as quick toggle as opposed to using the registry editor as shown above. Disclaimer: This tool has very advanced settings, only change them if you know what you are doing!
Otherwise you will completely mess up your install and may incur data loss.
1) Extract and Start Ultimate Windows Tweaker - upon starting it will create a recovery point so you can revert back later if you go crazy with the other settings. However it may not undo all your changes.
2) Navigate to the Windows 10 Tab at the top
3) At the bottom right hand corner untick and click apply to get the old style - the task bar will flicker and you may get a notification about a change. However if you want to re-enable, tick the box again and click apply again the taskbar will flicker.
Lastly it will prompt you to restart once you exit the tool, you can restart if you wish (unless you changed other settings which do require a restart to take affect then you will need to restart)
Download Link:
Ultimate Windows Tweaker 4 for Windows 10
Last edited:
") .
. Twitter