Share your W10M Start Screens and Backgrounds!

Forrest C

New member
Apr 2, 2014
10
0
0
Visit site
How the hell did you do these?

Use an app that lets you make empty tiles, then you can set them all the way transparent, or part of the way. Put a column of tiles down one of the sides so that you can freely place the tiles with out the phone automatically bunching them together at the top.
 

Gautam Kabiraj

New member
Sep 5, 2013
100
0
0
Visit site
Use an app that lets you make empty tiles, then you can set them all the way transparent, or part of the way. Put a column of tiles down one of the sides so that you can freely place the tiles with out the phone automatically bunching them together at the top.

Yeah, that is pretty much how I did it. For those of you want to know how, here's the procedure:

1. Go to Settings > System > Display, and move the slider to 250% or less (you'll be asked to restart the device, so just do that).

2. Go to Personalization > Start and toggle on Show more tiles.

3. Now, download and install this app called Tiles Texti from the Store. (the trial version will do the trick, too)

4. Open the app and select Medium Tile. Replace the text Text with Start / Games / Office / Social / Tools or whatever category you want to group your apps in. Under Font Style, choose Segoe WP (this looks homely with the Windows phone design language)... of course you can try others as you wish..

5. Choose the Font Color white. When you're satisfied, tap Pin to start.

------------- For the circular avatar / profile pic, you need Photoshop on your PC -------------

1. Open Photoshop and create a new PNG transparent image of 2:1.

2. Find a picture of yourself and crop it using Elliptical Marquee Tool.

3. Paste the newly cropped image on the right-most side of the transparent PNG image.

4. On the left side, you can write some stuff like... <your name> Signed in / Logged in etc etc..

5. Save this picture as a transparent PNG, and transfer it to your phone.

6. Now, download and install #TileArt from the Store.

7. Open the app, click Create tile art

8. You'll be shown four blue squares. Long tap on the first one and resize it into a wide tile.

9. From the bottom navigation bar, choose Pick image > Phone

10. Okay, now choose your transparent PNG picture which had your photo and name on it.

11. Resize the image inside the wide tile by dragging it with any two fingers.

12. Pin the tile when you're satisfied.

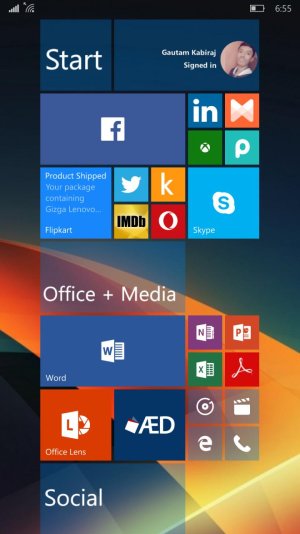
For demonstration, here I'm showing a picture on how the tiles are arranged (with lowered transparency).

wp_ss_20160123_0021.jpg

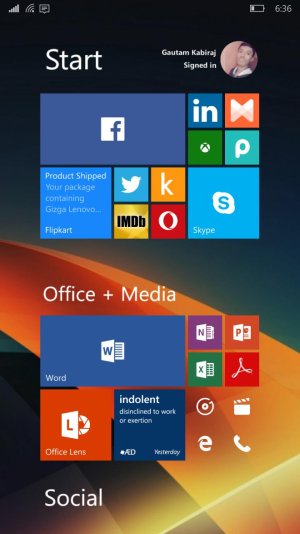
Once you're satisfied with the arrangement, you can change the tiles transparency to 100% (Settings > Personalization > Start > Tile Transparency).

wp_ss_20160123_0020.jpg

Thanks!
 

Members online

Forum statistics

Threads
322,919
Messages
2,242,896
Members
428,005
Latest member
rogertewarte